To move a row or column
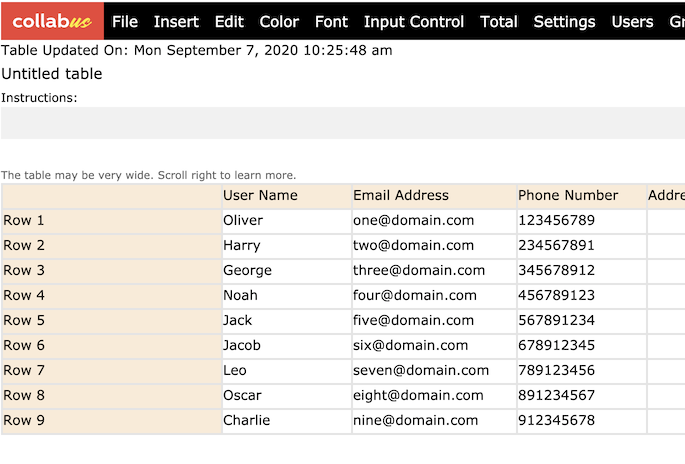
Suppose there is such a table below, and you want to move the "phone number" column to the front of the "email address".
The instructions for moving a row are the same.

Step 1
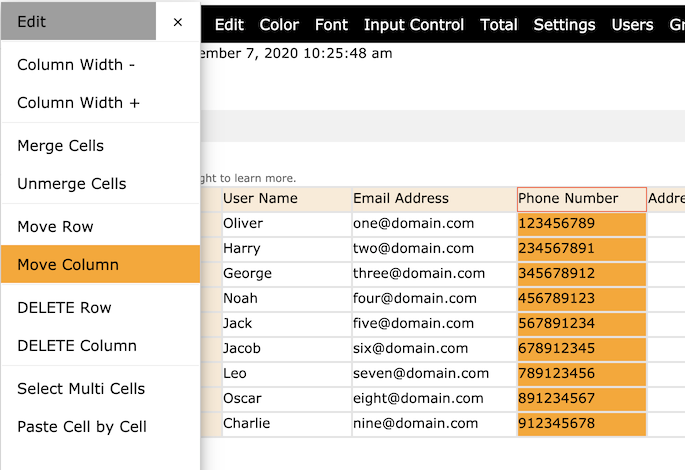
Click the first cell of the column, which is the cell with the label "Phone Number", and then click "Edit" on the top menu bar. On the "Edit" sub menu bar click "Move Column". Your window should now look like the following.

Note: The cells of the "Phone Number" column (except the first one) and the "Move Column" button are highlighted in orange. This means that the column is ready to move.
Tip: You can toggle the "Move Column" button to select and deselect the column.
Step 2
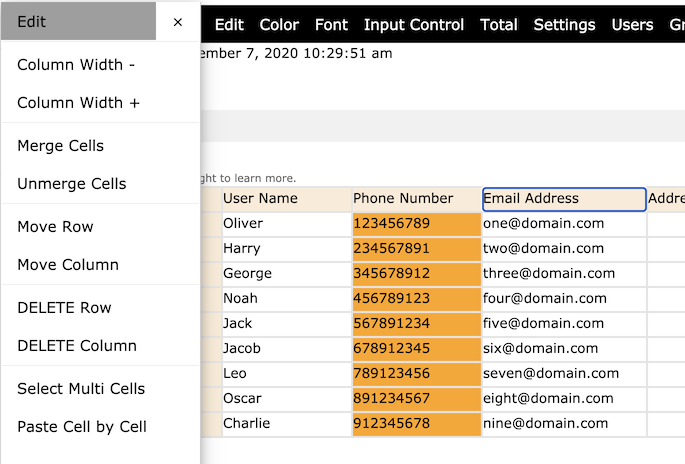
Click the first cell of the column (that is, the cell labeled "Email Address"). This is the column where you want to move the highlighted column to. Now, the "Phone Number" column is moved to the front of "Email Address" and the table has been saved automatically.

To delete a row or column
To delete a row or column, click any cell in that row or column, then open the "Edit" sub menu, and then click "DELETE Row" or "DELETE Column". When the confirmation window pops up, click "Yes".
Tip: If you want to delete multiple rows or columns, you must repeat this process one by one. Even if you select a range of rows or columns, only the last row or column in the range will be deleted.
Note: This function is only available to users with designer access rights.
