To set the font size of a cell
Step 1
Select (click) the cell whose font size you want to set.
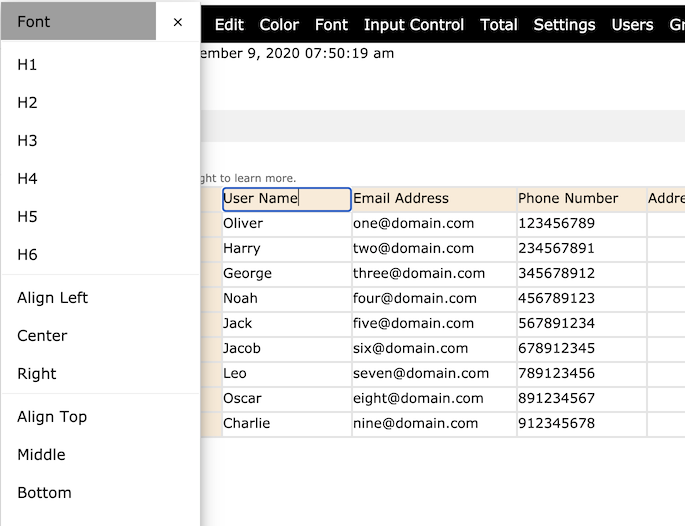
Suppose you select the cell shown below and the "Font" submenu opens.
Step 2
Click on the font size of your choice. In this example, H3 was selected.
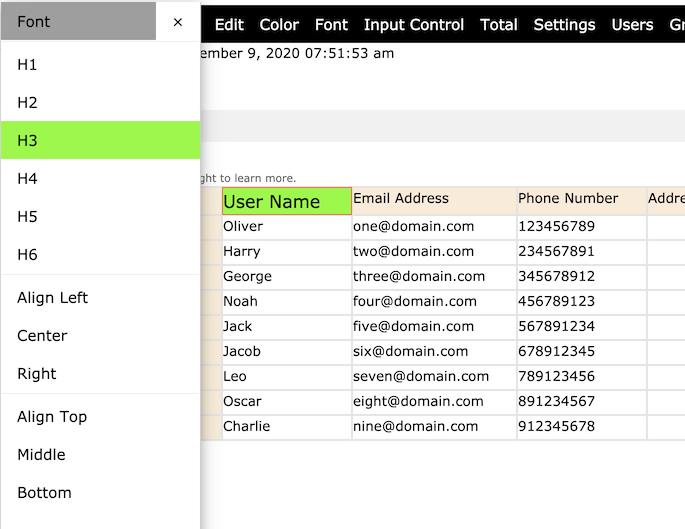
Now, the cell and the "H3" button are highlighted in green. This means that the last operation was successful. Now that the cell has a font size set, the highlight color of the button indicates the font size. If you move to another cell, you will see a highlighted font size button, indicating that the cell has a font size set. This is a quick way to show you whether the cell has a font size set.
Tip: Toggle the highlighted font size button to apply or delete the font size of the cell.
To set the font size to a range of cells
Step 1
Select the range of cells for which you want to set the font size. For instructions about how to select multiple cells, click here.
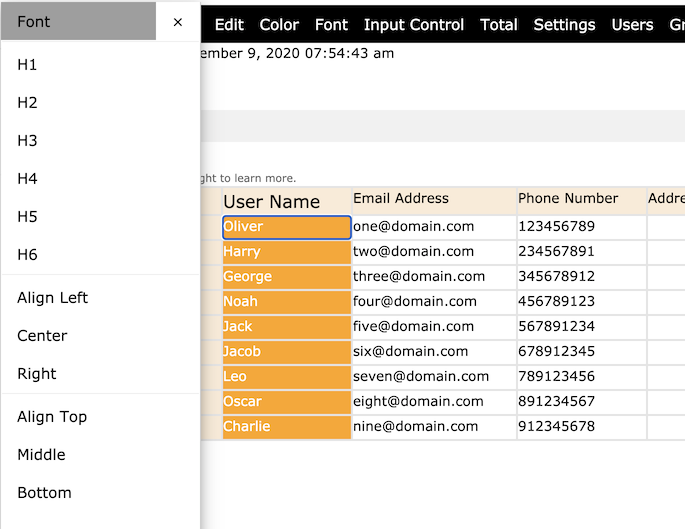
Suppose you have selected a range of cells as shown below in orange.
Step 2
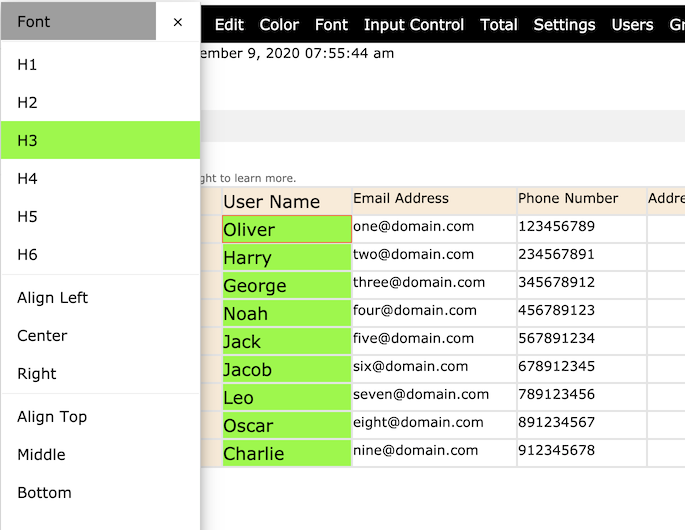
Click the font size of your choice. In this example, H3 was selected. The background color of the cells and the background color of the "font size" button are now green. This means that the operation was successful.
Tips:
1) Toggle the highlighted font size button to apply or delete the font size of the selected cells.
2) Click another font size and that font size will be applied.
To set content alignment to a cell
Step 1
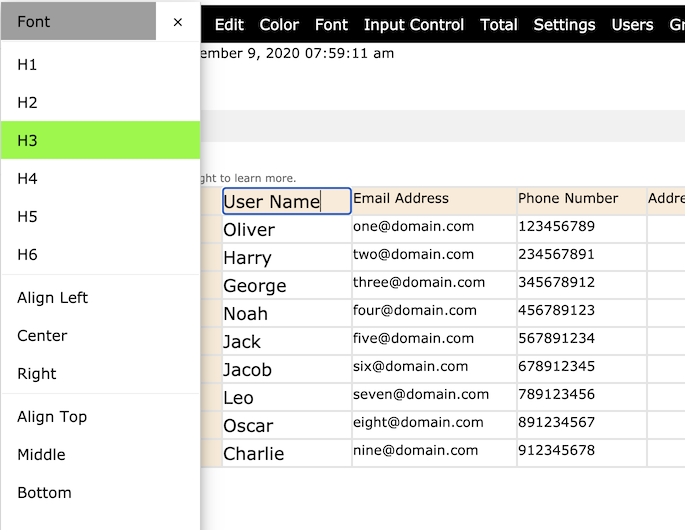
Select (click) the cell whose content alignment you want to set.
Step 2
Click on the alignment of your choice. In this example, Right was selected.
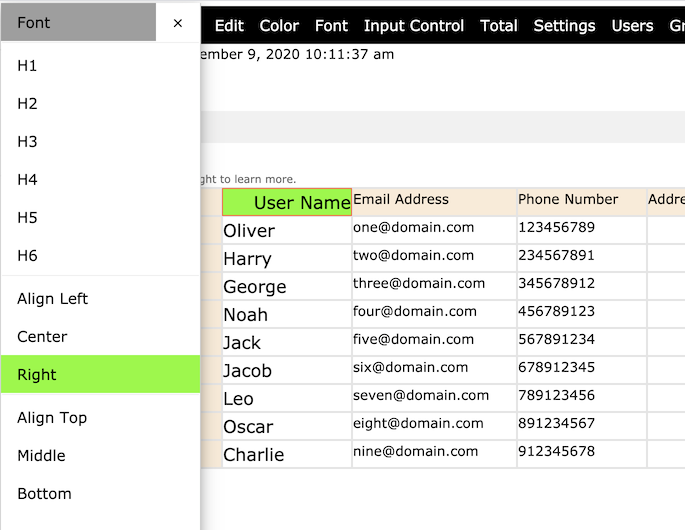
Now, the cell and the "Right" alignment button are highlighted in green. This means that the operation was successful. The content of the cell is now aligned to the right, and the highlight color of the button indicates the alignment. If you move to another cell, you will see a highlighted alignment button indicating the alignment that the cell has. This is a quick way to show you how the cell is aligned.
Tip: Toggle the highlighted alignment button to apply or delete the alignment of the cell.
To set content alignment to a range of cells
Step 1
Select the range of cells for which you want to set the alignment. For instructions about how to select multiple cells, click here.
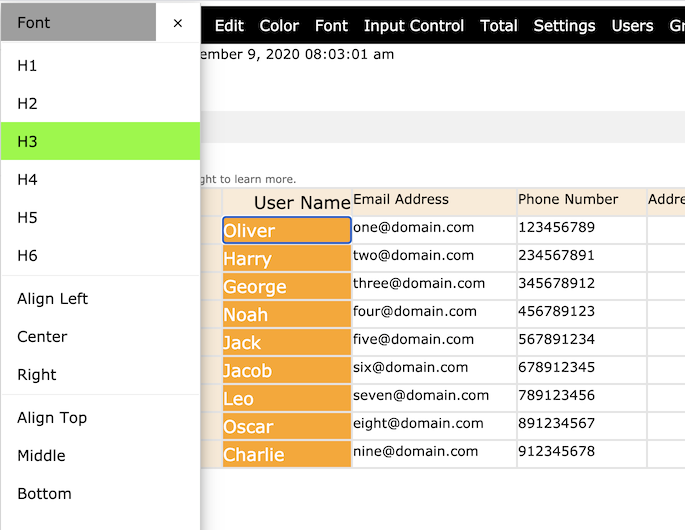
Suppose you have selected a range of cells as shown below in orange.
Step 2
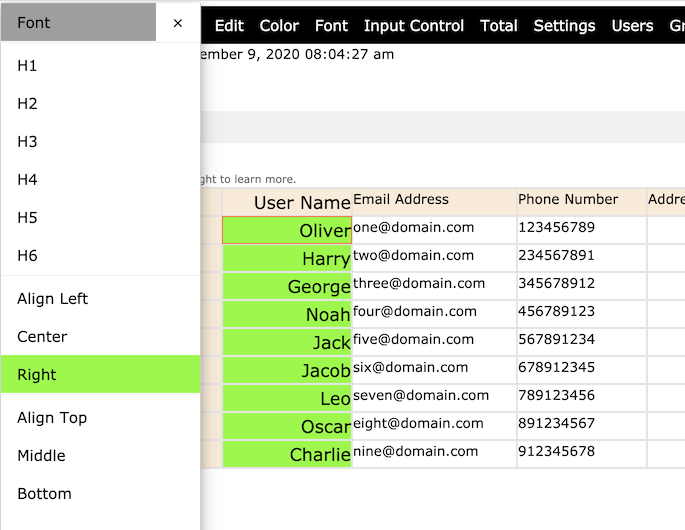
Click the alignment of your choice. In this example, Right was selected. The background color of the cells and the background color of the "Right" alignment button are now green. This means that the operation was successful.
Tips:
1) Toggle the highlighted alignment button to apply or delete the alignment of the selected cells.
2) Click another alignment and that alignment will be applied.
The instructions for setting content alignment for all other alignments are the same.
Note: This function is only available to users with designer access rights.
