Step 1
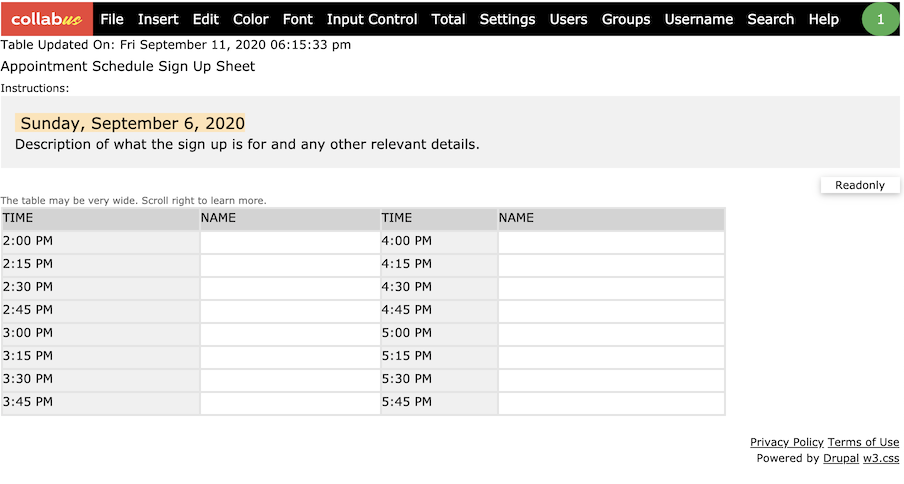
First, create your Collabus table and fill in the information. For instructions about how to create Collabus tables, click here.
Suppose you have designed an "Appointment Schedule Sign Up Sheet" as shown below.

Step 2
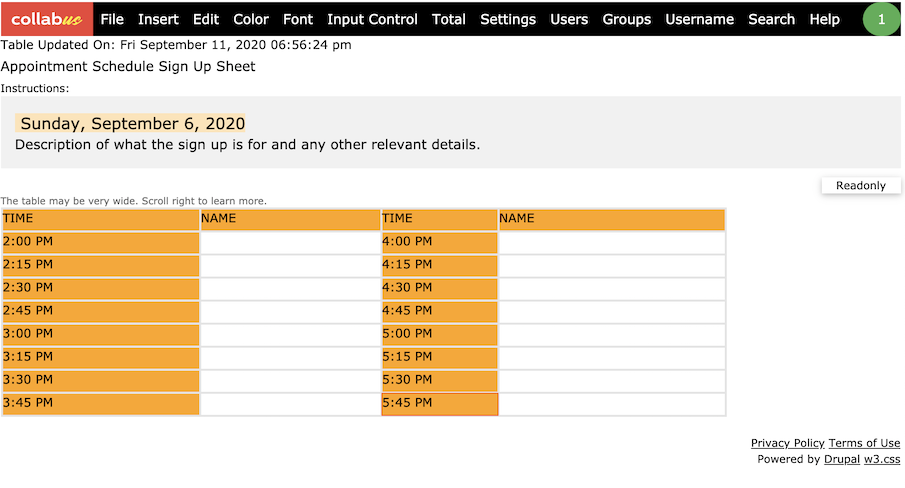
Lock the gray areas so that users cannot register in these areas. For instructions about how to lock cells, please click here
Note: This is an optional process. By default, users can register in any cell unit, regardless of whether there is content in that unit. The user's input will be appended to the existing content.

The orange highlight indicates the locked areas.
Step 3
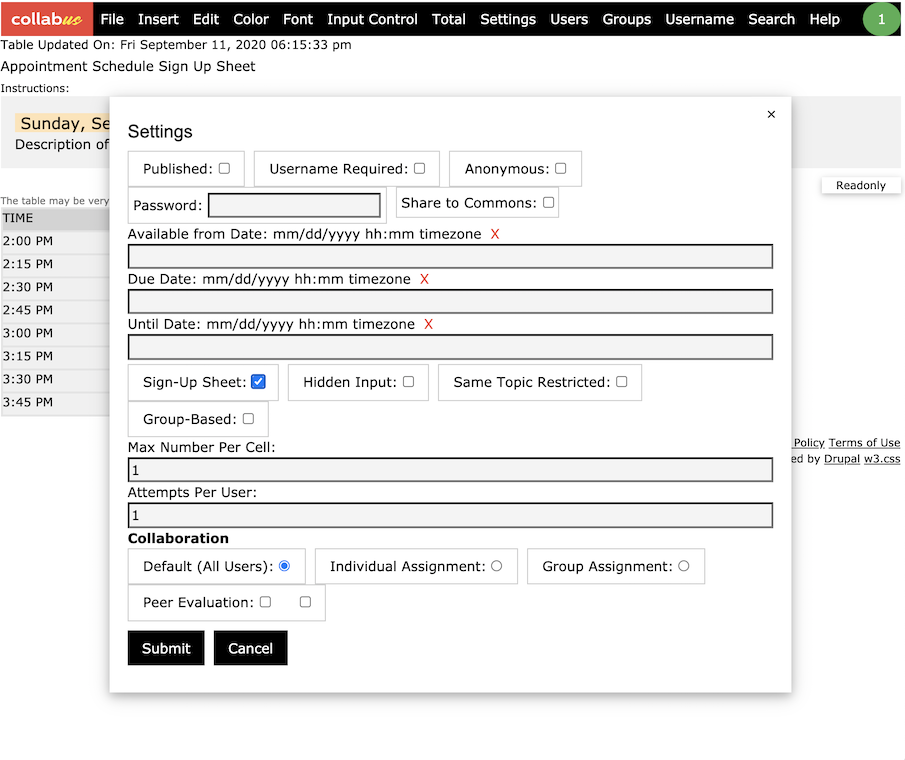
Click "Settings" on the top menu bar, and the "Settings" window appears, as shown below.

Step 4
Check the "Sign-Up Sheet" checkbox, then enter a number for the "Max Number Per Cell" and "Attempts Per User" text boxes, and then click Submit.
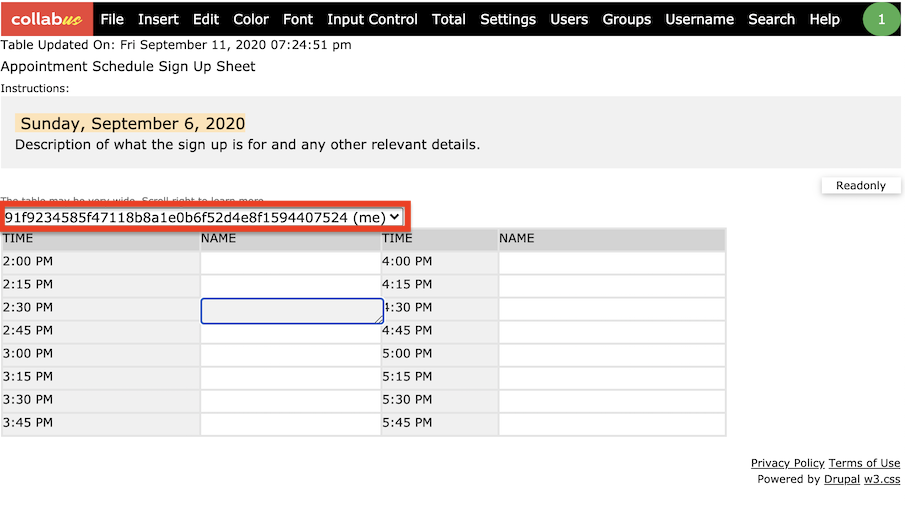
You should now be able to register your time slot.

Note: the highlighted red box is specially designed for moderators to make changes or sign-up on behalf of a user.
Options:
- If you want to create a hidden input or the same topic restriction or group-based sign-up sheet, check the relevant check box. You can check all of these as needed.
- By default, the sign-up sheet is class-wide. If you want to create an individual assignment (based on a single user) or a group assignment (the same users in a group), select the relevant check box.
For more information on other options on the settings page, click here.
Note: This function is only available to users with designer access rights.
